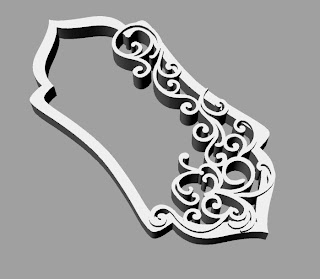
I was really excited for this part, because I like the thought of being able to have multiple pieces with the push of a button. In reality, it proved to be more difficult than this, but with lots of fussing I got a product that I was happy with.
I modeled the piece in Rhino and sent it to Shapeways to be printed in white, strong and flexible.
I also made this piece that I am excited to see.
Monday, November 29, 2010
Project 1 Part 3: Injection Molding
I've been working on this part of the Container project for a few weeks and I'm finally done.
I started with a clay model (not a good material choice) and made a mold. The mold material is very hard and is not forgiving at all.
Once I had both sides to my mold I started injecting. This proved to be very difficult and I had to make several modifications to the mold (widening the spout several times and cutting air vents). The closest that I got to a full form was the melted plastic extending to the bottom, but not filling the sides of the mold. I also tried filling each side of the mold separately and squishing them together. This sort of worked, but still looked messy.
After too many failed attempts to count, I decided to try using a hot glue gun to inject, because the plastic material reminded me of hot glue. I got 2 good forms with this method.
I painted one of them, but decided I liked the plain one better, so I added a cord.
Sunday, November 7, 2010
Ponoko Blog!
Check it out! My Hype project from last semester was named the "Product of the Week" on Ponoko's blog yesterday. That's pretty cool!
http://blog.ponoko.com/2010/11/06/toy-soldiers-and-tanks
Subscribe to:
Posts (Atom)